Cloud Room
Cloud Room is a secure portal within PaySpace geared towards outsource environments and payroll processes where customers send information to PaySpace and vice versa for processing and feedback/response purposes. Instead of exchanging information via insecure methods such as email, Cloud Room provides a secure portal to upload as well as track item statuses. Information can easily be audited, traced, and retrieved in a central environment at any time rather than tracking down information stored in various locations. The second feature of the Cloud room is the ability to define the customer's regular or ad-hoc process steps which will remind and control the responsibilities of the relevant users (Customer and Vendor) via notifications. Auditability is thus also transparent on both sides.
Security Governance! In alignment with PaySpace Outsourcing Security Governance and ISO 27001 standards, the user will utilise Cloud Room to transmit data to PaySpace and vice versa.
Make use of the following steps to configure the Cloud Room.
Step 1: Cloud Room is only available to company level users. They are created and maintained on the User Profiles screen.
Navigate > Configuration > Security > Security > User Profiles
Step 1.1. Ensure that "Company" is selected from the dropdown list and select the "+" button to add a new user profile.
Step 1.2. Complete the fields on the User Profile screen.
Step 1.3. Add the relevant security roles applicable. Important! The security role must give the user full access to the Cloud Room screen.
Step 1.4. Give the user access to the companies and the frequencies applicable.
Step 1.5. Thereafter, an activation email will be sent to the company level user, where they will be prompted to create their password.
Step 2: Configure the Period Processes and Payroll Processes Definition screens, as per the below screenshots, that will define the dropdown options on the Cloud Room screen.
Step 2.1. Navigate > Configuration > Basic Settings > Payroll Cycle Setup > Period Processes
Step 2.2. Navigate > Configuration > Basic Settings > Payroll Cycle Setup > Period Processes Definition
Step 3: The company level user can log into their profile and create a record on the Cloud Room screen with the document required by clicking on the "+ Item" button.
Navigate > Payroll Cycle > Cloud Room > + Item
Section and Field Explanations
- Item Subject - insert text that the receiving PaySpace consult will recognise (eg. the topic name or ticket number).
- Assigned Vendor - select "--vendor--" which means PaySpace.
- Status - select a status from the dropdown list.
- Group Name - Select an option from the dropdown list. (refer to step 2.1.)
- Checklist Item - Select an option from the dropdown list (refer to step 2.2.)
- Run - Select the run in which the document is being sent.
- Comments - Add a comment by clicking on the = button under the Comments section if required.
- Attachments - Attach a document/s under the Attachments section.
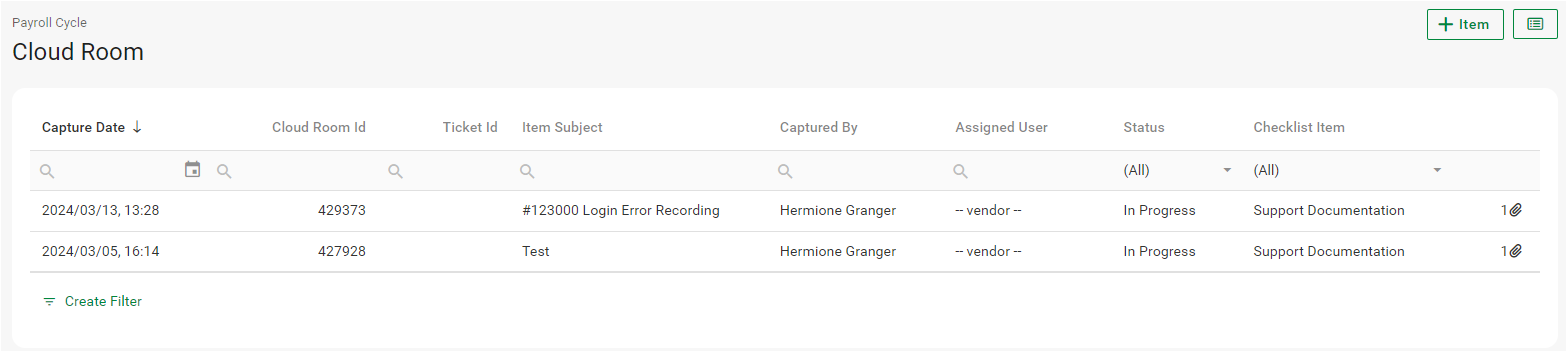
Once records/items are saved they will display on the face of the screen on the history grid.
Related Articles
Is PaySpace ISO 27001 certified?
Security is critical for any organisation. PaySpace’s cloud security offering goes far beyond what most companies have been able to achieve for themselves. Security is a multidimensional business imperative that demands to be considered at every ...How do I allow company level user access to reactivate inactive (blocked) users profiles?
To reactivate inactive (blocked) user profiles, the security roles to which company level users are linked, have to be amended so that full access is given to the User Profiles and/or Activate Users screens under the Company menu branch. Navigate > ...How do I add a new company level user?
Company level users are created and maintained on the User Profiles screen. Navigate > Configuration > Security > Security > User Profiles Step 1: Ensure that "Company" is selected from the dropdown list and select the "+" button to add a new user ...How do I configure a workflow path if a user is both a company level and ESS user?
Should a user have both payroll access and an ESS profile, a workflow path based on the company level user profile’s security role will have to be created. Navigate > Configuration > Security > Security > User Profiles Navigate > Configuration > ...Does the system verify whether an attachment selected has been uploaded before uploading them to Cloud Room?
A Status field has been added on the Cloud Room screen to inform users if their file is still Pending and they need to click on Update. Navigate > Payroll Cycle > Cloud Room > + Item Note! The maximum file size that can be attached has been increased ...